

Credit to Fred Switzer for figuring out the goddamned trick to this, while I was struggling to replace my unreliable brake light switch.
Note that the switch delivers 12V to the bulb. The switch does not provide ground, like some switches do. So the switch connector should have 12V on one of it’s pins.
Yank the old one out with a pair of pliers. Don’t need to be nice to it.
Find something to shove your brake pedal down. Alternately, grab a buddy and have him shove hard on the pedal while you struggle. It’s hard to fit 2 people in the footwell tho so wedging something in place that shoves the pedal is the better solution.
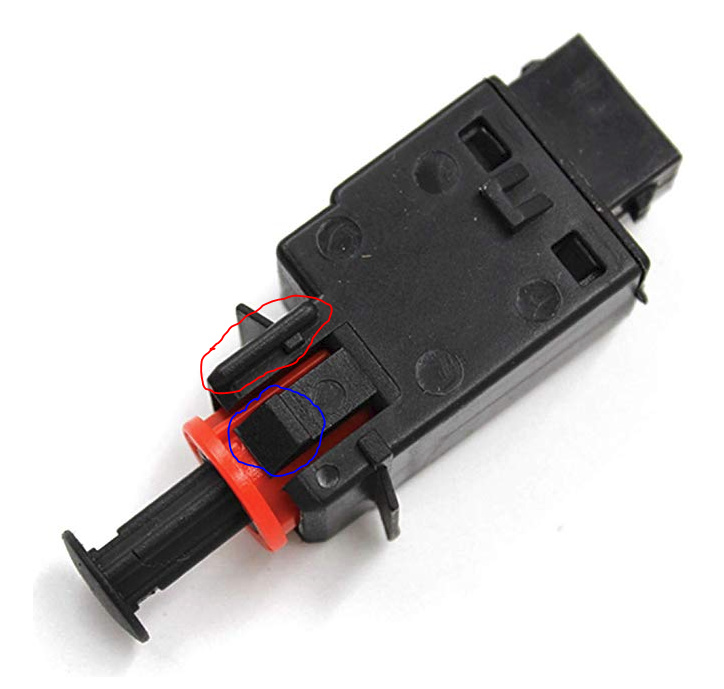
Study the picture.
The part circled in red determines the orientation of the switch. It goes on top.
Note the red plastic cylinder. Here’s the trick. Use your fingernails to pull it out and then shove it back a few times. The whole ballgame is the damned red plastic cylinder. Note the tang circled in blue. When the red plastic cylinder is pulled out, the tang can depress. So when you put the switch in place, the red cylinder has to be pulled out.
As you shove the switch in place, make sure that the red cylinder is staying fully pulled out…something only possible if the brake pedal is shoved back. Give it a good shove and the tangs on both sides should click in place. If they don’t, it’s probably because the red plastic cylinder snuck in a little bit.
Note that the switch in pic has a 2 wire connector, which is what fits my '87. I think some cars have a 3 or 4 wire connector.